Crafting a screen-accurate Boba Fett helmet isn't just a hobby; it's an odyssey into meticulous detail, precision, and a deep appreciation for the galaxy's most notorious bounty hunter. For serious enthusiasts aiming for true movie-level fidelity, "Boba Fett Helmet Customization & Mods" isn't merely about assembling parts—it's about transforming a raw shell into a weathered, battle-hardened icon that looks like it stepped right off the Slave I. This isn't a task for the faint of heart, but the reward is a piece of Star Wars history you've brought to life with your own hands.
At a Glance: Your Customization Journey
- Start with the Right Foundation: Most official licensed helmets aren't screen-accurate; seek out quality fan-made casts or specific vintage Don Post models.
- Embrace the "Screen-Accurate" Mantra: Every scratch, dent, and paint chip has a reference; deviation means inaccuracy.
- ESB vs. ROTJ (and beyond): Understand the distinct differences in helmet shape, paint scheme, and weathering between film appearances.
- It's a Marathon, Not a Sprint: Expect weeks, even months, of dedicated effort for painting, weathering, and assembly.
- Tools Are Your Friends: Dremels, precise sanding, quality paints, and a steady hand are indispensable.
- Connect with the Community: Forums like "The Dented Helmet" are invaluable resources for reference and advice.
Why Boba Fett's Helmet is the Mount Everest of Prop Building
Let's be blunt: building a truly screen-accurate Boba Fett costume, and especially his helmet, is widely considered the most challenging Star Wars prop to master. We're not talking about simply buying a licensed replica and calling it a day. Those unmodified Rubies or standard Don Post versions? They simply don't cut it for convention-level accuracy. Even Master Replicas and the rare Don Post Deluxe (Fiberglass) helmets are exceptions, not the rule.
The difficulty stems from an extreme level of detail in weathering, paint accuracy, and the subtle, organic shape of the helmet itself. This isn't a clean, pristine piece of armor; it's a testament to countless skirmishes and interstellar travel, each mark telling a story. Getting those stories right, down to the minutia, is where the real work begins.
The All-Important Foundation: Choosing Your Helmet Base
Before you even think about paint, you need the right canvas. Forget about picking up a helmet at your local toy store – they’re rarely, if ever, accurate. The foundation of a truly screen-accurate Boba Fett helmet typically comes from limited-run, unfinished casts produced by dedicated prop makers, or from specific vintage molds that have proven their worth.
Here's a breakdown of what to look for and what to avoid:
The Don Post Legacy: Vintage and Reimagined
For decades, Don Post helmets were among the few options available, but not all were created equal:
- Don Post '95 and '96 (Standard): These are acceptable bases for fiberglass copies. While approximately 15% undersized, their plastic isn't prone to warping, making them sturdy masters. A '95 with its white interior can fetch a high price on eBay, while a '96 is often more reasonable. Justin even based one of his ESB Boba Fett versions on a Don Post '95 mold, modifying it for that iconic "splayed out" look.
- Don Post Deluxe (Fiberglass): These are the rare gems among vintage DP helmets. Cast in fiberglass, they offer rigidity and can even be warped during production to achieve the specific "splayed out" ESB shape. Well Paid Killer's impressive Fett build, for example, started with a Don Post Deluxe recast.
- Don Post '97: This version often required significant rework, with both its dome and flair needing adjustment, as shown in comparisons with MLC1 and MLC2 helmets.
The Modern Masters: Fan-Produced Resin and Fiberglass
Today, the most highly regarded accurate helmets come from the vibrant community of prop makers:
- Natty's Movie Size Helmet (MSH): Once considered the gold standard for movie-accurate size, the MSH is no longer produced. Its legacy, however, lives on. Both Steve the Swede's and Chris King's renowned ESB Boba Fett builds were based on Natty's MSH, utilizing its precise dimensions and shape for stunning accuracy. Mikael's meticulous ESB Fett also proudly sported an MSH helmet.
- MSH2 (by FettPride): A work-in-progress building on the legacy of Natty's MSH, promising similar movie-accurate dimensions.
- Mystery Helmet (MH) (by Sgt. Fang): Cast from the Don Post ROTJ helmet, the MH is considered by many to be the most accurate ROTJ shape, albeit with minor Don Post modifications. Uniquely, the MH is made from Urethane Resin, not fiberglass, as seen in Blastech's impressive helmet. Size comparisons have even been done between the MH and MSH.
- MLCallanta (MLC): A highly regarded quality helmet available in two derivatives, MLC1 and MLC2. Han Hunter's ROTJ helmet, painted by Mikael, was based on an MLC2 fiberglass casting, praised for its lightweight, sturdy build, and pre-cut key-slots. Jodo_Kast also painted and weathered his own MLC2 helmet. These helmets often fall into the accurate size range alongside the MSH.
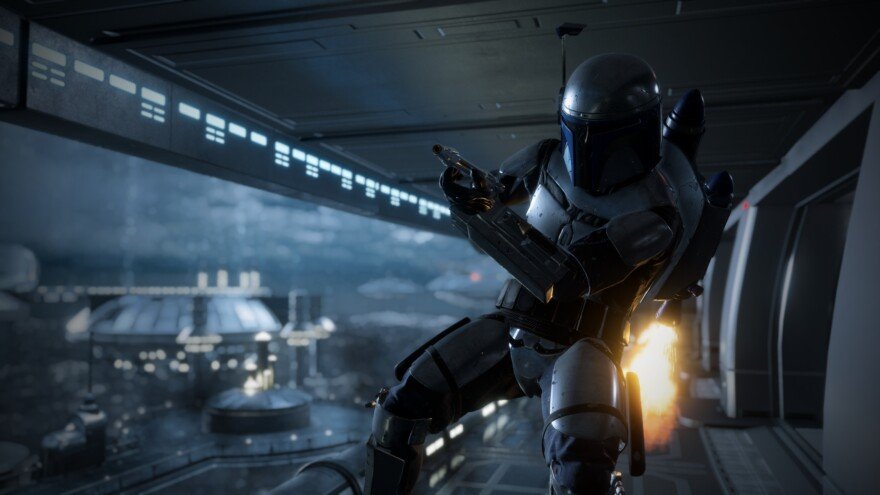
- Hand-Schaub: An original sculpt cast in aluminum, this helmet is particularly excellent for those aiming to create a screen-accurate Jango Fett.
The Takeaway: Your choice of base helmet dictates the accuracy ceiling of your project. Invest wisely here; it will save you countless headaches and compromises down the line.
Dissecting Screen Accuracy: ESB vs. ROTJ vs. Special Edition
Boba Fett's armor subtly evolved across films. To truly customize your helmet, you must first decide which cinematic appearance you're aiming for. Each iteration has distinct nuances in shape, color, and weathering:
- The Empire Strikes Back (ESB): Often considered the most iconic, the ESB helmet features a slightly "splayed out" look (particularly noticeable in the flare), a specific green hue (often described as greenish-grey or purple-grey in certain lights), and incredibly intricate battle damage. The weathering here is a masterclass in controlled chaos, with countless silver scratches, dings, and a general air of hard-earned wear.
- Return of the Jedi (ROTJ): The ROTJ helmet has a slightly more defined, less "splayed" shape, a darker, more saturated green, and a cleaner, though still weathered, appearance compared to ESB. Some of the iconic paint chips are different, reflecting new damage or repairs. Han Hunter’s detailed ROTJ helmet, using an MLC2 base and Mikael’s painting expertise, perfectly captures this aesthetic.
- Special Edition (SE): This version, seen in the re-released films, often aligns closely with the ROTJ aesthetic but can sometimes incorporate digital enhancements or altered lighting that shifts the perception of color and detail. FettPride's builds are known to capture this specific Special Edition look.
Understanding these differences is paramount. Reference photos from "Might of Magic" exhibitions or reputable prop archives are your bible. Steve the Swede's ESB Boba Fett, based on Natty's MSH, involved months of painting and weathering just to match these precise exhibition photos.
The Craftsman's Arsenal: Essential Tools & Materials
Boba Fett helmet customization is as much about skill as it is about having the right gear. Here's what you'll likely need:
- Dremel Rotary Tool: Indispensable for trimming excess resin or fiberglass from edges, cutting visor openings, and shaping details. Mikael, for example, used a Dremel to precisely cut his visor.
- Sanding Supplies: Various grits of sandpaper (from coarse to very fine) for smoothing seams, preparing surfaces for paint, and refining shapes.
- Epoxy/Adhesives: Two-part epoxy like Araldite is excellent for securing critical components like ear caps and rangefinder stalks, ensuring a strong, permanent bond.
- Primers: Essential for preparing the surface for paint, ensuring adhesion, and creating a uniform base. Grey primer is a common choice.
- Paints:
- Main Colors: Screen-accurate Boba Fett colors are notoriously difficult to match. Some builders, like Mikael and Han Hunter, achieve fantastic results with water-based Gouache paints, appreciating their matte finish and blendability. Others opt for precise color-matched acrylics or Testors Paints, as Steve the Swede used. Often, colors are custom-mixed, sometimes intentionally brighter to account for darkening after a clear coat.
- Weathering Paints: Black, browns, and metallic silver.
- Silver Pens: Pilot Super Color silver pens (thin and thick tips) are a secret weapon for replicating Boba's distinctive silver scratches, as employed by Mikael and Han Hunter.
- Chrome Spray Paint: For ear cap detailing, like the Graffiti chrome Han Hunter used.
- Brushes & Airbrush (Optional): While an airbrush offers smooth coats, many incredible builds (like Mikael's) are achieved solely with regular brushes for main colors and detail work.
- Masking Tape: High-quality tape is crucial for sharp lines and protecting areas during painting.
- Clear Coats: Matte or dull clear coats are vital for protecting your intricate paintwork and weathering. They also subtly darken colors and reduce the shine of metallic scratches, making them appear more aged.
- Visor Material: Often a dark, tinted plastic or welding visor material.
- Rangefinder Components: An aluminum rangefinder stalk (like those from Richie's Armor used by Steve the Swede and Mikael), a transparent rangefinder piece, and potentially red LEDs for functionality.
- Decals: Specific markings and kill stripes sourced from reputable community members (e.g., "The Dented Helmet" forum).
The Boba Fett Helmet Customization Journey: A Step-by-Step Glimpse
Let's walk through the general process, drawing inspiration from successful builds. This isn't a quick weekend project; it's a labor of love that can take months of intermittent work, as Mikael’s 7-month ESB build illustrates.
1. Initial Cleanup and Assembly
Your raw helmet cast will need some attention.
- Trimming: Use your Dremel to carefully trim away any excess resin or fiberglass flash from the edges of the helmet and around the visor opening. Precision here is key.
- Sanding Seams: Lightly sand down any mold lines or rough patches to ensure a perfectly smooth surface.
- Ear Caps: Test fit your helmet's ear caps. Once satisfied, sand the mating surfaces and glue them securely with a strong two-part epoxy.
- Visor Cutout: Using templates and your Dremel, carefully cut out the visor opening. Many helmets come with pre-marked or pre-cut key-slots, simplifying this step.
2. Priming and Base Coats
- Wash and Clean: Thoroughly wash the helmet with soap and water to remove any dust, oils, or sanding residue. Let it dry completely.
- Prime Time: Apply a uniform coat of grey primer. This creates an even surface for paint adhesion and helps reveal any imperfections you might have missed.
- Inner Darkness: For an authentic look, the interior of the helmet is typically sprayed black, as Han Hunter did with his MLC2.
3. The Intricate Dance of Painting & Weathering
This is where the magic (and the challenge) truly happens.
- Main Colors: Custom-mix your primary colors (greens, grays, reds) to match your chosen screen reference (ESB, ROTJ, etc.). Apply these with fine brushes, taking your time. Some artists, like Mikael, use Gouache, appreciating its opaque, matte finish. Remember, if you plan on a clear coat later, initial colors might appear brighter than the final result.
- The Scratches and Dings: This is the Boba Fett signature. Using blunt and thin-tipped silver pens, meticulously draw in the thousands of tiny silver scratches, dings, and paint chips that define his battle-worn look. This is a highly detailed, time-consuming step. Trace silvery areas with a pencil first for accuracy, as Mikael did.
- Decals: Apply any necessary decals, carefully positioning them according to reference photos. "The Dented Helmet" forum is an excellent source for screen-accurate decal sets.
- Misting and Dirt: To achieve a "dirtied up" appearance, some builders like Han Hunter mist the helmet with light primer and black spray paint. Others use acrylic washes or a diluted mix of water and dark paint, applying it with paper towels and wiping it off after drying for a subtle grime effect. V-Twins (Italy) spent extensive time on this aspect, reworking an original fiberglass helmet to meticulously match on-set weathering.
4. Rangefinder Assembly & Detailing
The iconic rangefinder is a crucial piece of the puzzle.
- Stalk Attachment: If your helmet isn't already prepped, groove the rangefinder housing for stalk attachment. Glue in your aluminum rangefinder stalk (like Richie's Armor's excellent pieces) with strong epoxy.
- LEDs (Optional): Drill small holes for two red LEDs if you want a functional rangefinder.
- Paint the RF: Paint the opaque parts of the rangefinder assembly black, leaving transparent areas clear if desired.
- Ear Caps (Revisited): Mask off the main helmet around the ear caps. Spray-paint the distinct chrome or metallic sections of the ear caps. Han Hunter used Graffiti chrome, then dulled it down with steel wool for a more worn look, further dirtying them with acrylic washes.
5. Visor Integration and Final Protection
- Visor Install: Hot-glue or otherwise secure your tinted visor into the helmet's opening. Ensure it's straight and doesn't obstruct your view.
- Clear Coating: Mask off your visor carefully. Apply several light, even coats of a dull or matte clear coat. This protects your painstakingly applied paint and weathering, subtly deepens and darkens the colors, and reduces any unnatural shine from the silver scratches, giving the helmet an authentic, aged appearance.
Going the Extra Mile: Advanced Mods & Nuances
For those who crave ultimate authenticity and functionality, several advanced mods elevate a great helmet to an extraordinary one:
- Functional Rangefinder Electronics: Beyond simple LEDs, advanced builders might integrate tilt sensors or microcontrollers to make the rangefinder retract and deploy, complete with sound effects.
- Internal Padding and Comfort: For wearability, adding custom-fit padding and a comfortable head harness makes a significant difference, especially for extended convention wear.
- Voice Changer: While not part of the helmet's exterior, integrating a voice changer system within the helmet dramatically enhances the immersion.
- Custom Interpretations: Some artists push boundaries, like Sky Gun Bros' Boba Fett, which is a stunning interpretation of Ralph McQuarrie's original concept art—a testament to artistic skill beyond direct screen replication.
Common Pitfalls and How to Dodge Them
The path to a perfect Boba Fett helmet is riddled with potential missteps. Here's how to navigate them:
- Starting with the Wrong Base: Attempting to modify a cheap, inaccurate plastic helmet into a screen-accurate piece is a losing battle. The shape will always be off. Always refer back to the insights provided in Exploring the Boba Fett Helmet for guidance on choosing your foundation.
- Rushing the Weathering: Boba Fett's battle damage is not random. Every scratch, dent, and blast mark has a specific location and intensity. Rushing this step results in a helmet that looks "dirty" rather than "battle-damaged." Take your time, use ample reference, and build layers of weathering.
- Inaccurate Paint Colors: The greens and grays of Boba Fett are notorious for being hard to match. Relying on generic spray paints will likely lead to an off-color helmet. Research specific paint mixes and formulations used by expert builders.
- Ignoring the Details: Small details, like the correct shape of the key-slots, the specific type of rangefinder stalk, or the subtle curve of the ear caps, collectively contribute to authenticity. Overlooking them can diminish the overall accuracy.
- Warping: Less common with quality fiberglass or resin casts, but cheaper plastic helmets can warp over time, especially with heat exposure. Ensure your base is stable. While Don Post '95 and '96 helmets are approximately 15% undersize, they are commendably not prone to warping, making them good master candidates for fiberglass copies.
Your Next Steps: Embracing the Hunt for Perfection
Crafting a screen-accurate Boba Fett helmet is a journey that demands patience, precision, and a willingness to learn. It's a testament to your dedication to the Star Wars universe and a deeply rewarding experience.
Don't be intimidated by the sheer volume of detail. Break the project down into manageable steps, arm yourself with quality tools and materials, and lean on the vast knowledge of the online prop-making community. Forums like "The Dented Helmet" are treasure troves of reference photos, tutorials, and expert advice from builders like Steve the Swede, Mikael, and Han Hunter, whose detailed processes provide invaluable blueprints.
Whether you're aiming for the gritty realism of ESB or the polished menace of ROTJ, the satisfaction of donning a helmet you've painstakingly brought to life is unparalleled. So grab your Dremel, mix those paints, and embark on your own bounty hunting expedition—the perfect Boba Fett helmet awaits your touch.